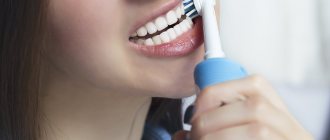
Every year, electric toothbrushes are becoming more common, and more people are switching from using mechanical devices to electric, more advanced gadgets. This is explained not only by the fact that such devices cope with their task better and more efficiently, but also by the fact that today they have become quite cheap. Of course, you still need to pay more for an electric brush than for a manual one, but its properties fully pay for themselves. On the modern market, such a device is represented by a lot of brands and an even larger variety of models, which, in turn, are distinguished by a wide range of characteristics and technical differences. The choice can stop at the simplest products at a price of $10, as well as those that cost more than $100 or more.
Of course, given that today toothbrushes have become “smart” and electric, such devices require some care. And so today we want to look at information about how toothbrushes should be cared for and repaired.
Caring for Electric Toothbrushes
To begin with, we suggest considering information about how to care for such important hygienic devices. To ensure that your brush serves you for as long as possible, and the cleaning effect remains at the same quality level, we recommend that you familiarize yourself with the tips described below:
- Carry out systematic rinsing of the brush. Both before and after the cleaning procedure, it is necessary to rinse the brush under running water. This way you can remove various particles of debris from the bristles. You don’t have to worry about the safety of the device, since modern brushes are moisture resistant and are not exposed to water;
- After brushing your teeth, always check the charge level of your toothbrush so that the next time you brush your teeth you won’t get a “pleasant” surprise in the form of a dead battery;
- Always keep the device upright. It is recommended to dry the brush only in a vertical position, placed in an empty, dry glass;
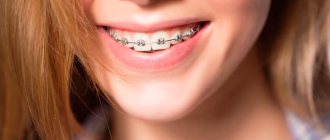
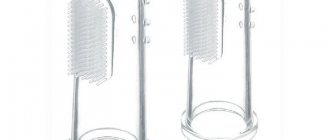
- Change attachments at least once every few months. Just like mechanical toothbrushes, electric ones also require periodic replacement. Fortunately, this does not mean purchasing a new device, but only purchasing a spare brush head. By making such a replacement in a timely manner, you can count on the fact that the effect of brushing your teeth with an electric brush will not decrease, and the attachment itself will not be a breeding ground for germs (after all, when using attachments for more than 3 months, they begin to accumulate a lot of bacteria);
- When changing attachments, it is necessary to perform a cleaning procedure, which involves thorough rinsing under running water. It is not recommended to use heat treatment (such as boiling), as this disrupts the structure of the bristle fibers.
When to change the battery
Like any other battery-powered device, the brush will break down within a few years. There are several signs that indicate that the Oral-B battery needs to be replaced:
- The device works, but is not as active as before.
- The effectiveness of oral care during normal activities decreases.
- A full charge only lasts for one cleaning.
- The device may turn off at any time.
If the Braun Oral-B electric brush is over 2 years old, then all of the above signs indicate a malfunction of the battery.
The device needs to be changed when it completely breaks down, but the nozzles should be changed once every three months. It is also necessary to look at the condition of the head and bristles, since everyone individually cares for the oral cavity. Accordingly, one person can use the attachment for 5 months, and another for 2.
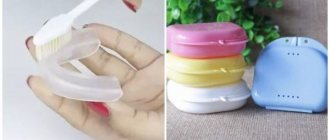
Using a sterilizer
Another important aspect when caring for an electric brush is the use of devices such as a sterilizer (also called disinfectors). This is a small device in the form of a case or cup, which serves to perform a more thorough procedure for sterilizing a toothbrush. Thanks to the use of an ultraviolet sterilizer, you can be completely sure that the brush will be completely sterile and ready for use after each sterilization procedure.
Some toothbrushes are sold with such devices included, but this only applies to more expensive gadgets. If you want to purchase a disinfectant separately, this is a fairly rational solution, but you should be prepared for the fact that such a device can cost the same as a budget electric brush - from 10 to 20 dollars (and some models even higher).
How to disinfect a toothbrush
20.09.2019
It is important to know! Scientists at the University of Manchester have calculated that a toothbrush may contain about one hundred million pathogens, including staphylococcus.
There are many more or less effective ways, let's talk about the most common ones.
- Boiling. You need to boil for fifteen minutes, then dry thoroughly. This method has a significant drawback: it damages the bristles, and they quickly wear out. In addition, this method is not suitable for electric brushes.
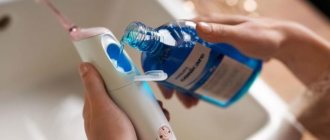
- Disinfection in rinse aid. Any mouthwash contains antibacterial components, so this method is completely justified.
- Chlorhexidine. The brush remains overnight in a solution of chlorhexidine (0.2%), which prevents the development and reproduction of microorganisms.
- Special tablets. They contain citric acid, sodium bicarbonate, sodium lauryl sulfate. The tablets are quite easy to use and have an affordable price.
- Vinegar. Fill a clean glass with vinegar and lower the toothbrush head down into it. Leave for several hours. After this, rinse it with clean running water. This method is not the best, since in such an aggressive environment the bristles can deteriorate and wear out faster. Plus, the smell and taste of vinegar is not that easy to get rid of.
Sterilizer for toothbrushes
Dentists believe that only a special sterilizer can provide the best disinfection. For complete care, you need to rinse the bristles well under water after use, buy new brushes regularly, and use a sterilizer once a week.
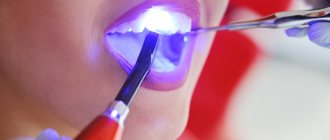
Ultraviolet sterilizers are the most effective. As a rule, the lid of such devices is transparent, so radiation breaks through it, which can be used to understand whether the device is working or not. The sterilization process takes only ten minutes, after which the device will automatically turn off.
Ultraviolet light has been proven to fight bacteria and microorganisms much more effectively than devices that disinfect using steam or sound waves.
Toothbrush sterilizers from the Russian brand Timson performed very well. To disinfect, it is enough to place the brush in the device for only 6-7 minutes. This device is easy to use and can be taken with you on trips, as it has the shape of a case. The case is adapted to fit any size brushes, including electric brush heads. The sterilizer runs on two AAA batteries.
How to charge an electric toothbrush
The next very important issue regarding the operation of the electric shield is the correct use of the device’s battery resources and extending its life. Many consumers who systematically use electric gadgets to brush their teeth mistakenly believe that the best solution is to charge the device daily, simply by keeping the brush on charge the entire time the gadget is not in use. Of course, such a hypothesis is doomed to failure, and such actions can only lead to rapid failure of the battery and the need to replace it. In fact, caring for your brush battery should be different, and below we will look at some practical advice from experts.
It is worth noting that some popular manufacturers of electric brushes today assure their consumers that recharging their devices is impossible. That is, if you leave the brush always installed on the charging base, there will be no problems with it, the charge will reach the maximum, and the device will automatically stop charging. However, this is not the most practical solution, so it is not recommended to use it.
Recharging the device
The battery device is supplied with a charger with a two-way plug for recharging. It is plugged into a socket for electric shavers, or using an adapter into a regular socket. Charging is carried out inductively, without metal elements connecting the handle and the device. Thanks to this, the charging base can be placed wherever it is convenient, including in the bathroom.
The best option for owners of electric brushes is to keep them charged all the time between uses. When first used, the manufacturer recommends fully charging the battery (within 12-16 hours), and then completely discharging it. Then fully charge the battery again and keep it in working condition. This procedure will extend the life of the battery. It is recommended to repeat it once every six months.
READ ALSO: How to choose the right charging electric toothbrush?
How to disassemble an electric toothbrush
Finally, we want to pay attention to the disassembly procedure for toothbrushes from different brands. After all, replacing the battery is not the only operation that brush users may need to perform during their operation. Therefore, it is important to know how to properly disassemble this gadget.
The following instructions must be followed:
- Check the device and make sure it is turned off.
- Remove the nozzle.
- Remove all brush elements that are attached without additional means, such as screws.
- Check the loose parts and unscrew them if possible.
- If we are talking about how to disassemble an electric toothbrush from Braun, Philips or similar brands, then the electrical base with the circuit board and brush controller is installed in the case without using any screws for fastening. Take pliers or tongs, and with their help, securely fixing the rotating element of the brush, pull it towards you. The base of the brush is installed in the body and secured with a rubber ring; with some effort, you can get it out.
- The brush can be considered disassembled.
All other elements of the base can be disassembled as simply as possible and do not require separate instructions. You may need a small shaped screwdriver to remove the screws. After disassembling the brush, you can:
- Replace diodes;
- Replace the battery;
- Replace buttons and other damaged elements;
- Remove and replace the motor.
After performing the necessary operations with the electrical shield, its assembly is carried out in the reverse order.
How to disassemble: stages
Braun Oral-B comes with a charger for activation.
But the model can work without a network, in which case it will function without recharging for a week. You can replace the battery yourself using these instructions:
- Disconnect all removable parts.
- Insert the device into the charger and twist it 15-20 times until you hear a click, which indicates the case is opening.
- Unscrew the small security screws.
- Carefully remove all internal components.
- Unsolder the contacts and remove the battery.
- Connect the contacts to the new battery.
- Insert the block into place and try to turn on the device. If it starts to work, reassemble the device completely.
- If the assembled model does not work, you need to put it on a short-term charge. But for this you will need: a new battery, a small screwdriver, a soldering iron.
When purchasing an original toothbrush, the kit includes:
- Charger;
- Toothbrush;
- nozzle, in some models there may be several of them.
Analysis of a mechanical model is no different from sound and ultrasonic. The differences concern:
- power;
- cost;
- appearance;
- number of combined movements.
Disassembling the Philips brush is practically no different from the Braun Oral-B, the only difference is in appearance and the place where the contacts are soldered when removing the battery.
How to change your electric toothbrush battery yourself
Even though the battery is by default a non-removable part of the brush design, replacing it is not that difficult. For this purpose, you can use the following instructions:
- Remove any removable structures, such as the brush head, from the brush.
- Find the device components attached to the case with small screws and unscrew them.
- Disassemble the device.
- Reach the battery and remove it.
- Remove the element from the Ni-MH battery that connects it to the contacts in the battery compartment. This may require the use of a soldering iron. The dismantling procedure is extremely simple - touch the heated tip of the soldering iron to the element, wait until it becomes hot and frees itself from tin.
- Take the battery you previously purchased as a replacement.
- Similarly, using a soldering iron and tin, attach the Ni-MH cell to the new battery.
- Return the battery to the compartment and reassemble the toothbrush.
- Check the functionality of the device with a new battery.
This way you can replace the battery in an Oral-B Triumph toothbrush and many other models, as well as from manufacturers such as Philips. As for directly purchasing replacement batteries, today you can buy such elements on well-known sites, such as:
- Ebay;
- Aliexpress;
- GearBest.
Now that you know how to care for, charge and repair toothbrushes, you will be able to not only use this device correctly so that it serves you as long as possible, but also independently remove and replace its elements if they fail.
When do you need to change batteries?
When it is not possible to connect to a power supply, a full charge of the electric brush should be enough for a week. A decrease in the functionality of the battery indicates that it is exhausting its resource and will soon need to purchase a new one. After how many months is the first replacement needed? Typically, at least 2 years pass from the start of operation to the first battery change. Signs your Oral B battery needs to be replaced:
- The charge is enough for 1-2 teeth brushing,
- the quality of oral cleansing decreases,
- The brush does not vibrate as actively,
- at the wrong moment the device turns off, although it was recently charging.
These signs may indicate other malfunctions of the device. It is better to re-read the instructions again, which describe non-working situations. If the brush is more than two years old, the probable cause of the malfunction is the battery.