In this article you will learn the main clinical and laboratory stages of making a stamped crown. If you don’t know, or want to learn more about the stamped crown itself (What is it?), you can read our article at the link.
Ready? Then let's go!
So, first we simply list the stages of making a stamped crown:
(All stages are divided into clinical and laboratory. Clinical stages are performed by a doctor, laboratory stages are performed by a dental technician.)
Clinical:
- Tooth preparation
- Taking impressions
- Casting a plaster model based on the impression
- Determination of central ratioLaboratory:
- Plastering the model into an articulator or occluder
- Modeling a future crown from wax
- Cutting out a plaster die from the model (on which the crown is modeled)
- Making a die from low-melting metal
- Selection of a blank sleeve
- Direct stamping Clinical
- Checking the crown in the clinicLaboratory
- Grinding, polishingClinical
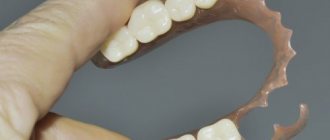
- Fixation of the crown.
Now we can look at each stage in more detail:
Preparation for a stamped crown
As you probably know, the thickness of the cap for a stamped crown is 0.3 mm. The volume of preparation will be the same. The tooth is shaped into a cylinder, removing 0.3 mm in the neck area (where the ledge is created). In the area of the equator, they are prepared to create a cylindrical stump. The occlusal surface is also prepared by 0.3 mm, and the relief of the cusps is approximately preserved.
Indications
Typically, stamped crowns are placed when the natural parts of the tooth can no longer be restored with fillings or inlays. This usually happens when more than 1/3 of the tissue is removed along with caries.
Except in cases of caries or impact trauma, stamped crowns can be placed as bridge abutments. This allows you to avoid grinding down excessively healthy teeth, or when it is impossible to install a cast structure.
Sometimes such crowns can even be placed on children’s baby teeth to correct their bite.
Taking impressions
Since a stamped crown is a budget prosthesis, and the technology for its manufacture does not imply high accuracy, the impression does not have to be accurate.
In the USSR, the most popular impression material was gypsum. Now, out of humanity towards patients, impressions are often taken with alginate.
As usual, 2 impressions are taken: a working one - of the jaw where the crown will be. And auxiliary - jaws with antagonist teeth.
Materials
Stamped crowns are made from 900 gold or special stainless steel (grade 1x18N9T), which is easy to melt and forge. If the factory stamped sleeve is made of gold, then, due to the softness of this variety, the cutting edge is soldered from a metal of a different standard - harder 750.
But usually gold crowns are no longer placed. And yellow metal crowns, manufactured in modern dental prosthetic workshops, are made by sputtering titanium nitride onto steel blanks, imitating 900 gold.
In addition to steel and gold, blanks made of platinum, an alloy of cobalt and chromium, silver-palladium and titanium can be used.
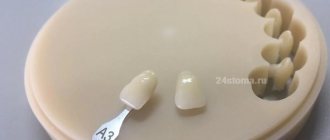
Modeling a tooth from wax
Before proceeding directly to the modeling, the technician outlines the clinical equator on the model. The crown is modeled 1 - 1.5 mm short of this equator. This is important for the future tight fit of the crown to the neck of the tooth.
The technician then applies liquid wax to the stump in an even layer, restoring the crown of the tooth. While the wax has not cooled, you need to close the models to get an imprint of the antagonist tooth, this makes it easier to model the chewing surface.
Once the wax has cooled, the technician finalizes the anatomy of the tooth crown. It is important that the crown modeled by the technician is 0.3 mm smaller than the one being restored, i.e. by the thickness of the metal layer. In the future, this gap will be filled with a crown.
a - outlining the line of the neck of the tooth with a pencil. b - border of wax application (dotted line) c - beginning of modeling the chewing surface
Cutting from a plaster die model
To obtain a metal stamp, a plaster stamp is cut from a plaster model of the jaw. A low-melting stamp will be exactly the same. Before cutting, the model is immersed in water for several minutes.
The plaster stamp is cut using a flat saw. An important point is that the width of the base of the stamp should be equal to the equator of the tooth. (Wider - and the stamped cap will rest against the base; narrower - there will be folds on the crown).
In the finished plaster stamp (on its base), another line is drawn 1 mm below the previously outlined clinical neck. Use a sharp spatula to make a groove along this line. Then the plaster is cut between the first and second lines.
Important: the area between the first and second lines determines the parameters of the subgingival part of the crown. Its diameter should be equal to the diameter of the neck. If it is wider, the crown will be large. If it’s already, the crown simply won’t fit. Ideally, this area should appear as a vertical line below the clinical neck.
As a result of the above steps, we will eventually lengthen the crown by 1 mm. What is it for? To create a reserve for future circumcision and crown grinding. Otherwise, the crown may end up short. And also, so that it is located 0.2 mm under the gum.
I - highlighting the simulated tooth on the model; II - contours for processing a gypsum column. III - guidelines for determining the length and width of an artificial crown: a - correct, b - incorrect.
User Questions
QUESTION Tell me, I have a gray crown on a molar that seems to be stamped. I noticed that the gum area around me was very red. Does this mean it’s time to change the crown or what? Sergey Anatolyevich
ANSWER Hello, Sergey Anatolyevich. Here you need to look at the situation - it is advisable to go to an orthopedist and get an x-ray. It is possible that food gets stuck under the gum, which is why it becomes inflamed. It is also possible that you have an allergy to metal. Perhaps some diseases have appeared under the roots, or cement has dissolved under the crown - and microbes penetrate into the resulting niche. After diagnosis, the dentist will make a verdict - whether the gum can be cured without removing the crown or not.
1Haug S. Correct modeling, 2006.
Author: Sambuev B. S. (Thank you for your help in writing the article and the information provided)
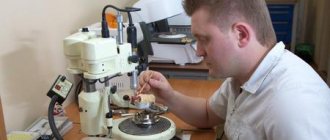
Making a die from low-melting metal
To make a metal stamp from a plaster stamp, use a special metal frame. The blanks are immersed in water for 5-10 minutes to prevent them from sticking to the plaster mold. Then the plaster is mixed, poured into the mold and smoothed with a spatula. The plaster stamp is half immersed in plaster and waits for it to harden. After this, the mold is removed from the frame, 2 recesses are made (to accommodate the protrusions of the other half of the mold) and lowered into cold water (to prevent sticking). This structure is then filled with plaster again to form the second part of the mold.
After hardening, the mold is opened (with a hammer), the plaster stamps are removed, the 2 parts of the mold are connected and secured in a special retainer. Low-melting metal is melted (there is a spoon with a spout) over an alcohol lamp and poured into a plaster mold, into specially pre-made holes. In total, you need to cast 2 dies for each tooth. One is for preliminary stamping, the second is for final stamping.
Making a metal stamp
Selection of a blank sleeve
Standard steel sleeves are used for stamping. They are produced by the manufacturer in various diameters. All that remains is to choose the appropriate technique. If suddenly a suitable sleeve is not found, you can reduce the sleeve to a larger diameter.
To reduce shell casings, two types of devices are used: the Sharp apparatus and the Samson apparatus. The mechanism of operation of these devices is as follows: There is a matrix with holes of a given diameter and metal pins (Punches). The gap between them is 0.3 mm, just the thickness of the metal. When the handle is twisted, the pin lowers and enters the hole, and the sleeve is pulled out along the diameter of the specified hole. A correctly selected sleeve is difficult to fit onto the die.
During machining, the liner loses its plasticity. Therefore, it needs to be periodically calcined (annealed); without this, the sleeve is difficult to process.
Before stamping, the sleeve is subjected to free forging. In this case, the sleeve is given the orienting shape of the future tooth using a hammer on the anvil. The sleeve is annealed.
Preliminary stamping (Carried out on a special lead plate. Before stamping, a small recess is made on it, using the first stamp, for the occlusal surface of the tooth. The stamp is hammered into the lead plate with a hammer): the sleeve is put on the first stamp and hammered into this stamp in the indicated recess, so that the contours of the chewing surface are imprinted on the sleeve. Forging continues, striking from the chewing surface to the equator. Once the chewing surface is completely finished, the sleeve is removed from the die and annealed again.
Dental laboratory
- Own laboratory
The FDC clinic has its own dental laboratory, equipped with the latest technology, so even the most labor-intensive orthopedic work is performed in the shortest possible time.
- Laboratory in France
Exclusive work, if necessary, can also be performed in the most prestigious dental laboratory in France, Bourbon Atelierd' Art Dentaire (Nice)
Direct stamping
The sleeve is put on the second stamp and stamping begins. It can be performed using one of two methods: the Parker method or the MMSI method.
Stamping of crowns using the Parker method (external method)
They are carried out in a special Parker apparatus. The device consists of a hollow base and a cylinder included in it.
The cavity in the base is filled with moldin (special clay). The sleeve, put on the stamp, is immersed in the mold (crown down), the cylinder is inserted and hit hard with a hammer. From impacts, the mass becomes compacted and evenly presses on the sleeve. The stamped crown is removed by melting the stamp in a melting spoon.
Then the crown is boiled in hydrochloric acid for 1-2 minutes, annealed and cut with crown scissors along the recess line. The edges of the crown are smoothed with carborundum roots. The accuracy of trimming is checked on a plaster stamp blank.
Stamping using the MMSI method
(MMSI - Moscow Medical Dental Institute)
In this method, instead of a mold, a counter stamp made of low-melting metal is used. This counter-stamp is obtained as follows: the second stamp is wrapped with a layer of adhesive plaster. Low-melting metal is poured into a special cuvette (it narrows downwards, turning into a cone). Until it hardens, the stamp is completely immersed in it. Then the resulting form is removed from the cuvette (a stand is placed on the ring and hit with a pestle). And they split it in half so that the stamp can be removed from it. The wax is then removed from the stamp and the crown is placed. Place in the original location in the counter stamp. The counter-stamp is placed in a cuvette and the crown is stamped with hammer blows. As a result, the counter-stamp enters the cuvette and presses on the walls of the sleeve. Stamping is completed when the counter-punch touches the bottom of the sleeve. Everything else is the same as in Parker's method.
How long does adaptation take?
How long does it take to get used to stamped crowns? As a rule, adaptation takes very little time - a day or two. It all depends on how well the structure is made and how long the patient walked with a damaged tooth. Since the product follows the anatomical shape, there is no particular discomfort when getting used to it.
Complex on 4 OSSTEM implants with delayed loading - from RUB 170,000.
Complex implantation Osstem (South Korea) with delayed loading after 4-6 months.
Guarantee for the doctor’s work - unlimited Call now or order a call
Opening hours: 24 hours a day - seven days a week
Fixation of a stamped crown
The finished crown is transferred to the clinic, where the doctor fixes it. First, the doctor checks the quality of the crown again. The stamping is fixed using special cement, usually GIC or zinc phosphate. The crown is treated with alcohol and dried. Dry the tooth stump. The cement is mixed to the consistency of liquid sour cream, added to the crown and placed on the tooth. The patient closes the teeth tightly and waits for the cement to harden. After this, excess cement is removed, and the patient is given recommendations on how to care for the prosthesis. And that is all.
Conclusion: This article lists all the basic steps of crown stamping. I hope everything became clear to you. Read other articles, watch the video AND REMEMBER: It’s not a shame not to know – it’s a shame not to want to know.
In what cases is restoration by installing a crown on a tooth indicated?
The procedure for installing a crown on a tooth has its own indications, including:
- Destruction of the crown part of the tooth by the carious process by more than 50%;
- Traumatic damage to a dental unit, in which its roots remain viable and are not damaged;
- Aesthetic defects that cannot be eliminated using other technologies: noticeable chips in the enamel, discoloration of the enamel coating, cracks.
A dentist may recommend installing temporary crowns for a patient with periodontitis: the procedure will help prevent further tooth loosening and prevent future tooth loss.
Restoration with crowns is contraindicated:
- For some blood pathologies;
- If you are allergic to local anesthetics;
- In the presence of chronic diseases of the body in the acute stage;
- In the presence of mental disorders.
Contraindications to the installation of crowns are identified during preparation for the prosthetic procedure and diagnostic studies.