SIDE EFFECTS
Polysiloxane has high biological tolerance. To date, no harmful side effects have been identified in patients or practitioners. Impression materials are designed to harden in the patient's mouth. The residence time of the drug in the oral cavity should not exceed more than twice the time of final hardening. Due to the high strength of the material, care should be taken to ensure that no particles of material remain in the interdental cavities. If the universal activator comes into contact with your eyes, rinse with water and consult a doctor!
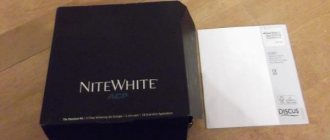
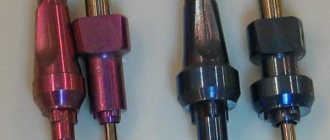
Impression masses Speedex (Spidex) / dental online store Pharmgeocom / Moscow
Speedex is an impression mass that allows you to make the most correct impression of the dentition. It is characterized by a low degree of shrinkage and high precision of reproduction of parts, making it possible to cast models in up to 7 days. The material is produced by Coltene (Switzerland).
Speedex – a new generation impression material
The effectiveness of treatment and the quality of orthopedic structures (usually crowns, bridges, dentures, veneers) depend on the accuracy of the dental impression. Elastic masses are known for their ease of use and high accuracy of finished models; Speedex, a modern silicone-based material, stands out among them.
Scope of application
Taking impressions using the two-layer impression technique; using the single-phase impression technique; using a copper ring; for creating diagnostic models in orthodontics, for making protective crowns.
Advantages
Dental mass Speedex (Spidex) is made of polysiloxane, a condensable silicone elastomer. This is a high-viscosity material of light gray color, which has many advantages:
- Quick preparation of the mixture - no more than 30 seconds.
- Hardens in 3 minutes, so the patient does not have to endure inconvenience for long.
- Depending on the complexity of the prosthesis, making the model will take from 30 minutes to three days.
- The design is highly durable and is not eroded by saliva, so its integrity will not be compromised during the manufacture of the model.
- The material is completely safe: so far, when used as directed, no side effects have been identified in patients or negative effects on doctors.
- Standard rigid and custom impression trays are suitable for the job.
- Compatible with any dental plaster, polyurethane and epoxy resin.
Operating procedure
1. For the first layer, scoop the required amount of mass with a spoon and remove excess material, then apply the required amount onto the palm of your hand and add the catalyst, then knead the material with your fingers until a uniform shade is achieved (at least 30 seconds). The material for the second layer is obtained by mixing the corrective layer and the activator.
2. Place the spoon with the mixture in the required position and hold it until the material hardens completely. After extraction, make sure that there are no particles left between the teeth, as hard fragments can cause discomfort to the patient or even damage the teeth.
Excess or insufficient amount of material increases or decreases the hardening time, which can negatively affect the quality of the impression, so it is important to monitor the optimal ratio of the amount of base substance and activator.
3. Once the impression is removed from the mouth, the model is cast within 30 minutes or later (ideally within 70 hours). Due to its high strength and good shape retention, the model can be made within a week. To remove surface tension, a fresh impression is treated with detergent and washed with running water.
Storage conditions
Speedex retains its properties until the expiration date indicated on the containers. Keep the material in tightly closed containers and immediately close the tubes and jars after use.
Storage temperature from 15 to 23 °C. Avoid exposure to direct sunlight and elevated temperatures in the laboratory.
Impression materials in the dental online store shop.pharmgeocom.ru
We offer to buy impression mass S peedex (Spidex) in Moscow at. Call or place an order on the website. We cooperate with both wholesale and retail customers.
Large selection of dental products
The range includes high-quality materials for filling, treatment and restoration of teeth, dental cements, accessories for orthopedics and therapy, various equipment, burs and endodontic files, as well as gloves, disposable clothing, consumables and much more. etc.
Operational work of managers
The exact price for Speedex (Spidex) for specific items is indicated on the website. Specialists will clarify the details of cooperation and the final cost of delivery, and if necessary, they will help in choosing suitable products and provide price lists that interest you.
Delivery across Russia
We deliver materials for dental clinics and dental laboratories in Moscow and the Moscow region, and ship to any region of the country.
Source: https://shop.pharmgeocom.ru/catalog/ortopediya/ottisknye-materialy/ottisknye-materialy-speedex/
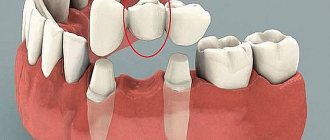
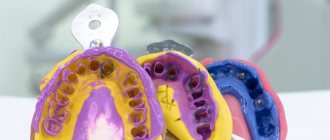
| When creating metal-ceramic prostheses, it is necessary to obtain the so-called double impressions, consisting of a main (preliminary) and clarifying (corrective) layers, which reflect the relief of the tissues of the prosthetic bed with greater accuracy than single-layer ones. An impression is a reverse (negative) reflection of the surface of hard and soft tissues located on the prosthetic bed and its boundaries. Of the impression materials for obtaining double impressions, silicone impression materials are most often used, which are produced in the form of two pastes - the main one and the corrective one. The catalyst can be a liquid or gel supplied with these pastes. The consistency of the paste determines its clinical purpose after preparation (mixing): -High viscosity pastes (base and catalyst pastes or base paste and catalyst Liquid/Gel) are used alone or as the first, base layer in double prints ; -low viscosity pastes (base and catalyst pastes or base paste and catalyst liquid/gel) are used as a second, or corrective, layer in double impressions. A paste of dense consistency (high viscosity) is collected with a special measuring cup and, after adding the catalyst, mixed by hand. Mixing time 30-45 s. Some silicone masses harden after 2.5-4 minutes, others after 5-8 minutes. Uniformity of consistency and uniformity of color are indicators of the readiness of the paste. To prepare the corrective paste, a catalyst liquid/gel or paste is added to the required amount, measured using a paper dosage scale placed under a glass plate. They are mixed using a plastic spatula until a uniform consistency or color is obtained. When producing low-viscosity pastes in cartridges, a mechanical manual mixing gun is used to mix the components. Silicone impression material and mechanical manual mixing gun An impression tray with perforations is coated with a thin layer of special adhesive. To carry out the manipulation you need: 1) a set of tools (mirror, tweezers, angled probe, smoothers of different sizes, a special shaped knife); 2) means for retraction (knitted rings or cotton threads). Double impression technique.As a rule, this procedure is carried out in two stages. In the first of them, a basic dense paste (Ortosil, Zetaplus, ZM Express, Bisico, Speedex) mixed with a catalyst is applied to a release tray lubricated with adhesive and an impression is taken. At the same time, in order to create space for the corrective paste, the procedure is carried out before preparing the teeth, without removing the provisional (temporary) crowns or by first covering the impression material with a strip of thin polyethylene film. In this case, there will be some space for the clarifying (correcting) layer, which will facilitate obtaining a more accurate impression without excessive pressure on its individual areas. Filling the tray with the main impression material (explanations in the text) Preliminary impression of the upper jaw After preparation, a pharmacomechanical expansion of the gingival groove (pocket) of the supporting teeth is carried out, a linen or cotton thread or a knitted ring is introduced there, pre-impregnated or ex tempore with solutions of a vasoconstrictor and an astringent. Insertion of a retraction thread into the gingival grooves of prepared teeth: a – beginning; b- end of the procedure Hollow cotton cylinders are used to dry (including stop bleeding from the gingival sulcus) the hard tissues of the tooth and fix the retraction thread when taking double impressions After inserting the retraction cord into the gingival sulcus, a cotton cylinder is placed into the prepared tooth. The dentition is then fused to provide a clean, dry, and open gingival sulcus. The cotton cylinder and retraction thread are removed immediately before taking the corrective impression. The first layer of the impression personalizes the standard tray with which it was produced. A layer of paste is cut off on it at the top of the roof of the palate and along the edges of the impression for its free reintroduction into the oral cavity. In addition, the interdental septa are removed to prevent compression of the interdental papillae. Finally, the outlet grooves are engraved from the tooth impressions to the top of the palatine vault, radially, to prevent elastic deformation of the impression. Preparation of the first layer of double impression for applying the corrective mass Then the first layer of the print is dried and filled with a low-viscosity clarifying paste (Xantopren, Oranwash, Thixoflex, Bisico, etc.). Application of a low-viscosity corrective impression mass to obtain a clarifying impression The threads are removed from the pockets, and the pockets themselves are dried with a stream of warm air. They can be filled with corrective paste using a special syringe with a curved cannula. Filling gum pockets with corrective paste using a syringe with a curved cannula You can take an impression without using a syringe by filling the impression with clarifying paste and reintroducing it into the oral cavity. After the corrective paste has hardened, the impression is removed from the patient’s mouth. Double impression after removal from the patient's mouth |
DOSAGE
Using a measuring spoon, measure out Speedex Putty. Distribute the measured amount onto your hand. Press the amount of each measured spoon of base with the edges of the measuring spoon.
Squeeze one strip of universal activator onto the resulting circle.
After use, close the tube immediately!
POSSIBILITY OF OVER AND UNDER DOSAGE:
Overdosing or underdosing may affect setting time.
CLINICAL ACTION TIME (20% EXCESS OF ACTIVATOR DOSAGE)
The total setting time is 3 minutes. Even a minimal curing time is enough to work with the material.
MIXING
Mix the material by hand until a uniform shade is obtained, but not less than 30 seconds. When using mechanical mixing devices, follow the manufacturer's instructions.
TAKEING AN IMPRESSION
When taking an impression, insert the impression tray and press for 2-3 seconds, then hold without pressing until it hardens completely. Residues of material require more time to harden at room temperature. Therefore, check the degree of hardening of the impression before removing it from the oral cavity. Intensive kneading or high temperatures speed up the hardening process; low temperatures slow down the hardening process.
Mixing Speedex
Speedex must be vigorously mixed with your fingertips until the marbling disappears and a homogeneous material is obtained, at least 30 seconds. When using mechanical mixing devices, you must strictly adhere to the instructions for use.
Taking an impression When taking an impression, quickly (within 2-3 seconds) set the spoon with the material in the required position, then hold the spoon with the material in the specified position until the material hardens completely. The material hardens at room temperature longer than in the oral cavity. Therefore, before removing the spoon with the material from the mouth, check whether the material has hardened intraorally. Elevated temperature, active mixing, as well as an overdose of the Universal Activator accelerate the hardening of the material; lower temperature and a reduced amount of Universal Activator slow down the hardening of the material.
Important: in order to ensure connection with the correction layer and avoid delamination, the impression must be thoroughly rinsed and dried before applying the correction mass. When using hydrogen peroxide as a disinfectant, the impression must be rinsed well in running water to avoid the formation of pores.
Disinfection After removing the impression from the oral cavity, it should be rinsed with running water. Final disinfection takes at least 30 minutes. in liquid disinfection solutions such as 2% acidic glutaraldehyde, 0.5-1% sodium hypochloride, 0.1-1.5% providone iodide (halogenated phenol) or 0.13% neutral glutaraldehyde do not affect the surface and do not cause distortion of the impression. Acrylic spoons should be protected from water absorption.
IMPORTANT:
To ensure perfect bonding with the correction material, the initial impression should be thoroughly cleaned and dried before subsequent use. If hydroperoxides are used for disinfection, rinse thoroughly with warm water to avoid the formation of bubbles.
DISINFECTION
After removal from the oral cavity, the impression should be rinsed with warm water. Subsequent disinfection in aqueous disinfectant solutions: 2% glutaraldehyde, 0.1-1.5% providone iodide (halogen phenol) or 0.13% neutral glutaraldehyde does not affect either the surfaces or the timing. Acrylic impression trays should be protected from absorbing water.
MANUFACTURING THE MODEL
The impression can be cast between 30 minutes and 72 hours. It is also recommended to wash the impression with detergent and rinse it thoroughly with warm water to facilitate the drainage. You can use common impression materials: gypsum (Fuji-rock, Vel-mix), epoxy rubber, polyurethane.
GALVANIZATION (METAL COATING)
The impressions may be galvanized with silver or copper plates.
CLEANING THE IMPRESSION TRAY
Hardened impression material can be removed with a blunt instrument. The adhesive easily dissolves in ordinary solvent. Solvents may only be used in a well-ventilated area. After using the solvent, clean the impression tray as usual and disinfect it.
SHELF LIFE AND STORAGE
Speedex Putty will remain stable until at least the date printed on the can when stored in a well-sealed container at a temperature of 15-23°C and 50% relative humidity. Store new containers in an upright position, with the lid facing up. Impressions should be stored at room temperature. Avoid heat and direct sunlight.
MARKING
The expiration date (year month) and lot number are indicated on the containers.
TECHNICAL CHARACTERISTICS ISO 4823: 1992
- Measurements were made at a room temperature of 23°C and a relative humidity of 50%.
- ISO mixing time: 30 sec.
- Total ISO processing time: max. 1 min. 30 sec.
- Setting time ISO: 3 min.
- Damage recovery: >98.0%
- Pressure damage: 4%-6%
- Damage changes: -0.50%
Making models
Ideally, the impression should be cast between 30 minutes and 72 hours after removal from the mouth. Briefly washing the cast in a washing solution and then thoroughly rinsing it in clean warm water reduces surface tension and makes the process of making the model easier. All approved dental model materials can be used, such as plaster (eg Fuji-rock, Vel-Mix), epoxy resin or polyurethane.
Galvanization Casts can be galvanized in the usual manner in copper or silver baths.
Cleaning Impression Trays Cured material can be removed with a blunt instrument. When immersed in all-purpose solvent or light gasoline, Coltene Adhesive will dissolve. Solvents should only be used in well-ventilated areas. Spoons can be cleaned and disinfected in the usual way.
Storage of Spidex corresponds to its characteristics at least until the expiration date indicated on the material, if the package is tightly closed, at a temperature of 15-23 ° C and a relative humidity of 50%. Impressions can be stored at room temperature. Avoid exposure to high temperatures and sunlight.
Delivery set: Speedex putty - 910 ml jar.
ADVANTAGES
- Dimensional stability during curing and storage. Possibility of casting models within 7 days.
- Controlled working hours. The ability to accelerate/slow down the hardening of the material by changing the amount of activator.
- Surface activity.
- Hydrophilicity.
INSTRUCTIONS FOR USE (SPEEDEX PUTTY / SPEEDEX LIGHT BODY)
Speedex universal activator is a component of Speedex dental impression compounds based on C-silicone. The basis of the material is polysiloxane. The polysiloxane elastomer is capable of forming a network structure based on the condensation reaction. The material is green.
MIXING:
Speedex Putty is a pre-impression compound based on C-silicone, in jars for manual mixing. The basis of the material is polysiloxane. The polysiloxane elastomer is capable of forming a network structure based on the condensation reaction. The mass has a light gray color.
HAND MIXING:
- The material is taken out of the jar using a measuring spoon. The spoon must be completely filled. Excess material should be removed.
- The material from the measuring spoon should be placed on the palm of your hand and spread evenly over the surface. Leave the imprint of a measuring spoon on the mixture.
- Squeeze the Universal Activator onto the mass in an amount equal to the diameter of a measuring spoon, based on a measuring spoon of mass for each spoon.
- Depending on the over- or under-dose of the activator, you can change the hardening time of the material in the mouth.
- Mix the material vigorously with your fingers until the mixture is completely homogeneous.
Speedex light body is a corrective impression compound based on C-silicone, in tubes. The basis of the material is polysiloxane. The polysiloxane elastomer is capable of forming a network structure based on the condensation reaction. The mass has a dark blue color.
- Squeeze two equal-length strips of material and Universal Activator onto the mixing block.
- If it is necessary to reduce (increase) the hardening time, you should increase (decrease) the amount of activator.
- Place one of the components on a spatula and thoroughly rub it into the other component. Mixing time 20 seconds.
Indications for use of Spidex:
- material for the base impression using the double-layer impression technique
- external impression material using the two-phase impression technique
- external impression material for the copper ring impression technique
- material for control models, including orthodontic ones, bite keys, casts for making protective crowns after tooth preparation.
Contraindications: None identified with standard use.
Side effects:
Polysiloxanes have very good biological tolerance. To date, no adverse reactions have been observed in patients or clinic staff. Impression materials are designed to harden in the mouth to form a non-elastic impression. The maximum residence time of the material in the oral cavity is limited to twice the hardening time. Despite the high resistance of the material to conditions in the oral cavity, it is necessary to ensure that upon completion of work in the interdental space, no material remains in the periodontal sulcus. Areas where material may become trapped must be protected before the impression is taken. If the catalyst gets into your eyes, you must rinse them with plenty of water and then consult an ophthalmologist.
The universal activator is not dangerous for tissues (it is not marked in the form of a St. Andrew's cross).
Impression trays: Standard rigid impression trays. To enhance the retention of the Spidex material to the impression tray, it is recommended to first apply a thin layer of Coltene, an adhesive, to its surface.
Dosage: Remove Spidex Putty from the jar using a measuring spoon (excess material must be removed). Place the material from the measuring spoon in an even layer on your palm. Print the diameter of the measuring spoon on the mixture.
Squeeze out an amount of Universal Activator equal to the diameter of the measuring spoon for each measuring spoon of mass. Close the tube with the activator immediately after use!
Over- and under-dosage is allowed: Depending on the over- and under-dosage of the Universal Activator, you can change the hardening time of the material in the oral cavity.
With minimal hardening time for the Spidex material in the oral cavity, the working time is sufficient to perform high-quality work.
APPLICATION. METHOD 1: DOUBLE MIXING IMPRESSION.
- Prepare the material according to the instructions.
- Fill the impression tray with Speedex Putty.
- Apply Speedex light body to the impression area. This point should be performed simultaneously with the previous one.
- Place the filled impression tray in your mouth and make an impression.
- After the curing time has expired, remove the finished impression from your mouth.
APPLICATION. METHOD 2: CORRECTIVE IMPRESSION
- Fill the impression tray with Speedex Putty and place it in the mouth for the required time.
- Once the time is up, remove the preliminary impression from your mouth.
- Make drainage channels in the preliminary impression and eliminate defects.
- After correction, thoroughly rinse and dry the preliminary impression.
- Apply Speedex light body to the impression area and to the pre-impression.
- Place the impression tray in your mouth and wait for it to cure.
- Dry the final print and store it until pouring.
Directions for use and doses
According to the instructions for use, you must adhere to the following rules:
- Measure out the optimal amount of mass using a measuring cup (measuring spoon), distribute it on your hand, and knead well. (When scooping the mixture with a spoon, it should be lowered into the mixture only once).
- Squeeze out equal parts of the activator and catalyst, mix them with the main mass.
- Place in the mouth, wait until the mixture becomes elastic and less viscous.
- Using a measuring spoon, pull the impression out of your mouth.
The required dose of the mixture is selected using a hard measuring spoon. It is important to remember that too much or too little of the mixture can affect the hardening time. The mass can be used with all modern types of dental plaster.
The mass must be thoroughly mixed with your fingers for at least 30 seconds until the marbling disappears and the material becomes uniform. If special mixing devices are used, the procedure must be followed according to the instructions for their use.