Root canal preparation
In the early days of modern endodontics, there were many concepts, strategies, and techniques for root canal preparation. Over the past decades, dozens of tools for passing and shaping channels have appeared.
A breakthrough in clinical endodontics occurred with the transition from the use of a long series of stainless steel instruments and multiple Gates Glidden reamers to the use of nickel titanium instruments for root canal preparation. Regardless of the techniques used, the goals of mechanical root canal treatment were brilliantly defined almost 40 years ago by Dr. Herbert Schilder [1]. With the correct treatment algorithm, mechanical treatment of root canals should correspond to the biological goals of canal preparation, three-dimensional disinfection and obturation.
Preparation of root canals with instruments
In 1988, Walia introduced Nitinol, a nickel-titanium alloy for root canal preparation that is 2-3 times more flexible than stainless steel alloy, and for the same instrument sizes. A revolutionary result of the use of instruments made of nickel-titanium alloy was the ability to machine curved canals using continuous rotation. By the mid-1990s, the first commercially available nickel-titanium rotary instruments appeared on the market [3]. The following is a mechanical classification of the latest fifth generation of instruments.
Fifth generation
The fifth generation of canal preparation instruments differs in that the center of gravity and/or the center of rotation is shifted (Fig. 1).
Rice. 1. Cross section of the Pro Taper Next tool. Note the off-center mass of the tool, which reduces the degree of screwing into the channel, provides more space for sawdust and improves flexibility.
When tools with a similar shape are rotated, a mechanical wave of motion arises that moves along the entire length of the tool. Similar to the progressive taper of any ProTaper instrument, the offset center of gravity further minimizes friction between the instrument and dentin [13]. Also, this design improves the removal of sawdust from the canal and improves the flexibility of the active part of the Protaper Next tool.
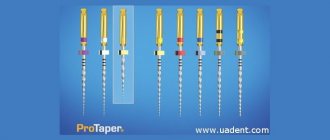
The new ProTaper Next™ (PTN) system (Dentsply) features 5 instruments of varying lengths, labeled X1, X2, X3, X4 and X5. From 1 to 5 they are color coded to correspond to sizes 17/04, 25/06, 30/07, 40/06 and 50/06. The taper listed is not fixed across the entire working end of the ProTaper Next™ tool. ProTaper Next™ tools operate at 300 rpm. and torque from 2.0–5.2 N cm. However, the authors prefer a torque of 5.2 Ncm because this level of torque has been found to be safe as long as clinicians carefully create a carpet path and use gentle outward sweeping movements during progressive root canal preparation [14]. In the ProTaper Next™ technique, all instruments are used exactly the same and the sequence of use always follows the ISO color coding and is always the same, regardless of the length, diameter or curvature of the canal.
ProTaper Next™ preparation technique
As with any root canal preparation technique, great care must be taken to create straight access to each orifice. This involves widening, smoothing and finishing the internal axial walls. For estial access, the ProTaper Universal® system offers an optional instrument called the SX. The SX instrument is used with an outward sweeping motion to pre-expand the orifice, remove dentin triangles or create a more pronounced shape. A small hand instrument is initially used to widen and smooth the inner walls of the canal. Once the entire length of the root canal is patent, a continuous rotation instrument can be used to create a carpet path [15]. To be clear, a channel is only prepared when it is empty and has a proven smooth and repeatable carpet. Knowing the expected working length, in the presence of a viscous chelating agent, insert a #10 K-file instrument into the root canal and see how easily the instrument moves toward the apex. In shorter, wide and straight canals, the #10 instrument can be easily inserted to the full working length. Once the #10 tool has been confirmed to move freely to its full working length, the carpet can be further widened with either a #15 hand tool or specially designed tools such as the Pathfile™. The created carpet path provides sufficient space for machining to begin with the ProTaper Next™ X1 tool. In other cases, teeth requiring endodontic treatment may have longer, narrower, and more curved root canals (Figure 2).
Rice. 2. A tooth that serves as a support for a bridge in the lateral region and requires endodontic treatment. Pay attention to the orientation of the denture relative to the roots.
In such situations, the #10 instrument often does not penetrate the entire length of the root canal. It is generally not necessary to use #06 and/or #08 hand instruments in an attempt to immediately reach the apical foramen. Simply and gently work the #10 hand instrument within any area of the root canal until the instrument is completely free. ProTaper Next™ instruments can be used to create any part of the root canal with a smooth, reproducible carpet. The ultimate goal is to complete the entire working length of the root canal, establish the working length and check the apical patency (Fig. 3).
Rice. 3. Photo in progress: removal of the crown, isolation and #10 instruments inserted into the root canals, which have different curvatures.
Safe work with the canal can begin after checking the created carpet, when tool #10 does not stick at the working length and can slide and move again in the area of the lower third of the root canal. When the canal is prepared, the access cavity is generously filled with a 6% NaOCl solution. You can begin canal preparation with the ProTaper Next™ X1. It should be emphasized that ProTaper Next™ instruments are never used in an inward pushing or pecking motion. Conversely, ProTaper Next™ tools provide an outward sweeping motion. Instrument X1 is inserted into the access cavity into the previously expanded orifice and prepared canal. Before meeting resistance, consciously begin sweeping outward movements (Fig. 4).
Rice. 4. Mechanical wave of motion moving along the active section of the Pro Taper Next X1 instrument.
Such movements create lateral space and allow this instrument to penetrate a few millimeters inside. Continue working with the ProTaper Next™ X1 along the main portion of the root canal. As you immerse the tool, for every subsequent few millimeters, remove it and examine it, while simultaneously cleaning the blades. Before re-inserting the X1 instrument into the root canal, it is strategically important to irrigate and flush out large sawdust, and reinsert the #10 instrument to break up the residual sawdust and debris into solution, then re-irrigate to refresh the solution. In one or more passes you should reach the working length of the X1 tool. For thorough mechanical preparation purposes, irrigate, recapitulate, and re-irrigate after removing any rotating instrument.
Take the ProTaper NEXT™ X2 and allow it to plunge into the root canal. Before resistance appears, apply lateral sweeping movements away from the dentinal walls. This in turn will move the X2 instrument into the root canal passively and progressively. The X2 tool will easily follow the path created by the X1 tool, making further expansion and gradually moving along the entire length.
If the tool gets stuck and stops moving, remove it, clean it and check the edges. Re-irrigate, recapitulate and re-irrigate. Continue working with tool X2 until working length is reached; note that one or more approaches may be required depending on the length, width and curvature of the canal (Fig. 5).
Rice. 5. Pro Taper Next X2 instrument inserted to the full working length into the mesiobuccal canal.
Once the ProTaper NEXT™ X2 has reached working length, it is removed. The created form can be considered final only if the grooves in the apical part of the instrument are visually filled with dentin. Alternatively, the apex size can be checked with a 25/02 hand instrument.
If the #25 hand instrument sticks at the working length, the preparation is complete. If the 25/02 hand instrument moves freely at working length, this means that the apical foramen is wider than 0.25 mm. In this case, the apex can be calibrated using a size 30/02 hand tool. However, if a #30 size hand tool does not reach the apex, proceed to the ProTaper NEXT™ X3 tool, following the same operating procedure as the ProTaper NEXT™ X1 and ProTaper NEXT™ X2. Most root canals will be in optimal shape after using ProTaper NEXT™ X2 or X3. ProTaper NEXT™ X4 and X5 instruments are primarily used for preparation and finishing of larger diameter root canals. If the apical foramen is determined to be larger than the ProTaper NEXT™ 50/06 X5 size, turn to other methods for preparing wide, straight canals. It is important to recognize that carefully prepared canals promote shaping, three-dimensional cleaning, and obturation (Figure 6).
Rice. 6. Temporary fixation of the bridge and the created shape of the root canals.
Conclusion
ProTaper NEXT™ is the 5th generation system that combines the proven performance characteristics of the past with the latest technological advancements. This system should simplify the procedure of canal formation with rotary instruments, reducing the number of instruments and eliminating the so-called hybrid techniques. From a scientific perspective, evidence-based studies are needed to confirm the potential benefits of the system.
Acknowledgment: The authors would like to acknowledge Dr. Michael J. Scianamblo for his work and participation in the creation of the ProTaper NEXT™ System.
At the time of publication of the article, the described product is at the registration stage.
Read the full article in the Dentsply News magazine.
Payment Methods.
- Online payment - payment by bank cards, through terminals, electronic money (VISA, QIWI, Yandex.Money, MasterCard).
- Payment by cash on delivery. The order is sent by cash on delivery via Russian Post.
- Cashless payments for individuals. Payment for the order by bank transfer.
- Cashless payments for legal entities. Payment for the order by bank transfer.
- Cash payment upon receipt of goods, via courier delivery.
ONLINE STORE opening hours:
- Mon - Fri from 10-00 to 19-00
Cash
You can pay for your order in cash to the courier upon receipt or at the pickup point. When receiving the goods, be sure to check the order contents and the availability of the receipt.
Cashless payments
After placing your order, a payment invoice will be generated, which you can print. Wait for confirmation of information about the availability of goods and the final order amount from our managers. The funds will arrive in our account within 2-3 business days after payment for the order. Payment for orders by clients - legal entities is possible only by bank transfer. All documents necessary for accounting (original invoice for payment, invoice, invoice) are issued along with the order upon receipt.
Bank cards
The payment acceptance service is provided by PayAnyWay.
| PayAnyWay does not transfer your card data to the store or other third parties. The security of payments using bank cards is ensured by secure HTTPS connection technologies and 3D Secure two-factor user authentication. In accordance with the Federal Law “On the Protection of Consumer Rights”, if you are provided with a service or sold a product of inadequate quality, the payment may be returned to the bank card from which the payment was made. Please check with the administration of the online store for the refund procedure. |
Electronic money
| Moneta.Ru To make payments using the Moneta.Ru payment system, you need to have a wallet, which can be registered on the system’s website. Methods for replenishing your wallet can be found on the Moneta.Ru website in the “How to top up” section. Payments are processed instantly through Moneta.Ru. |
| WebMoney To make a payment, you must be registered in the WebMoney Transfer system. WMR title units are accepted for payment, money is credited instantly. |
| Yandex.Money To make payments using the Yandex.Money service, you need to have a wallet registered on the payment system website. Payments are credited through the Yandex.Money payment system instantly. |
| QIWI Wallet Select QIWI Wallet as payment and enter your cell phone number. Pay the automatically created invoice on the payment system website. If you do not have a QIWI Wallet, you need to register it on the service website or in any of the QIWI Wallet applications. |
Banking services
Online banking systems: Sberbank Online, Alfa-Click, Qbank Svyaznoy Bank, Promsvyazbank, Russian Standard, Faktura.ru. By bank or postal transfer, as well as through the CONTACT money transfer system.
Payment terminals
Eleksnet, OPLATA.RU, Federal System City, Moscow Credit Bank, Forward Mobile, CiberPay, Platika, NPO "LEADER", ComePay.
SMS services
Mobile operators Megafon and MTS
Have questions about payment? Use detailed instructions for each payment method or contact us.
PayAnyWay customer support
Phone E-mail
Details for non-cash payment:
MEDMARKET STOM LLC Legal address: 125464, Moscow, Pyatnitskoe highway, 15 (building 1) INN 7733903616 / KPP 773301001, OGRN 5147746405956 Bank details: Account No. 301018104000000002 25 Bank: OJSC “Sberbank of Russia”, Moscow, BIC 044525225 Personal account number 40702810638000036993 tel/fax, e-mail
Contract offer